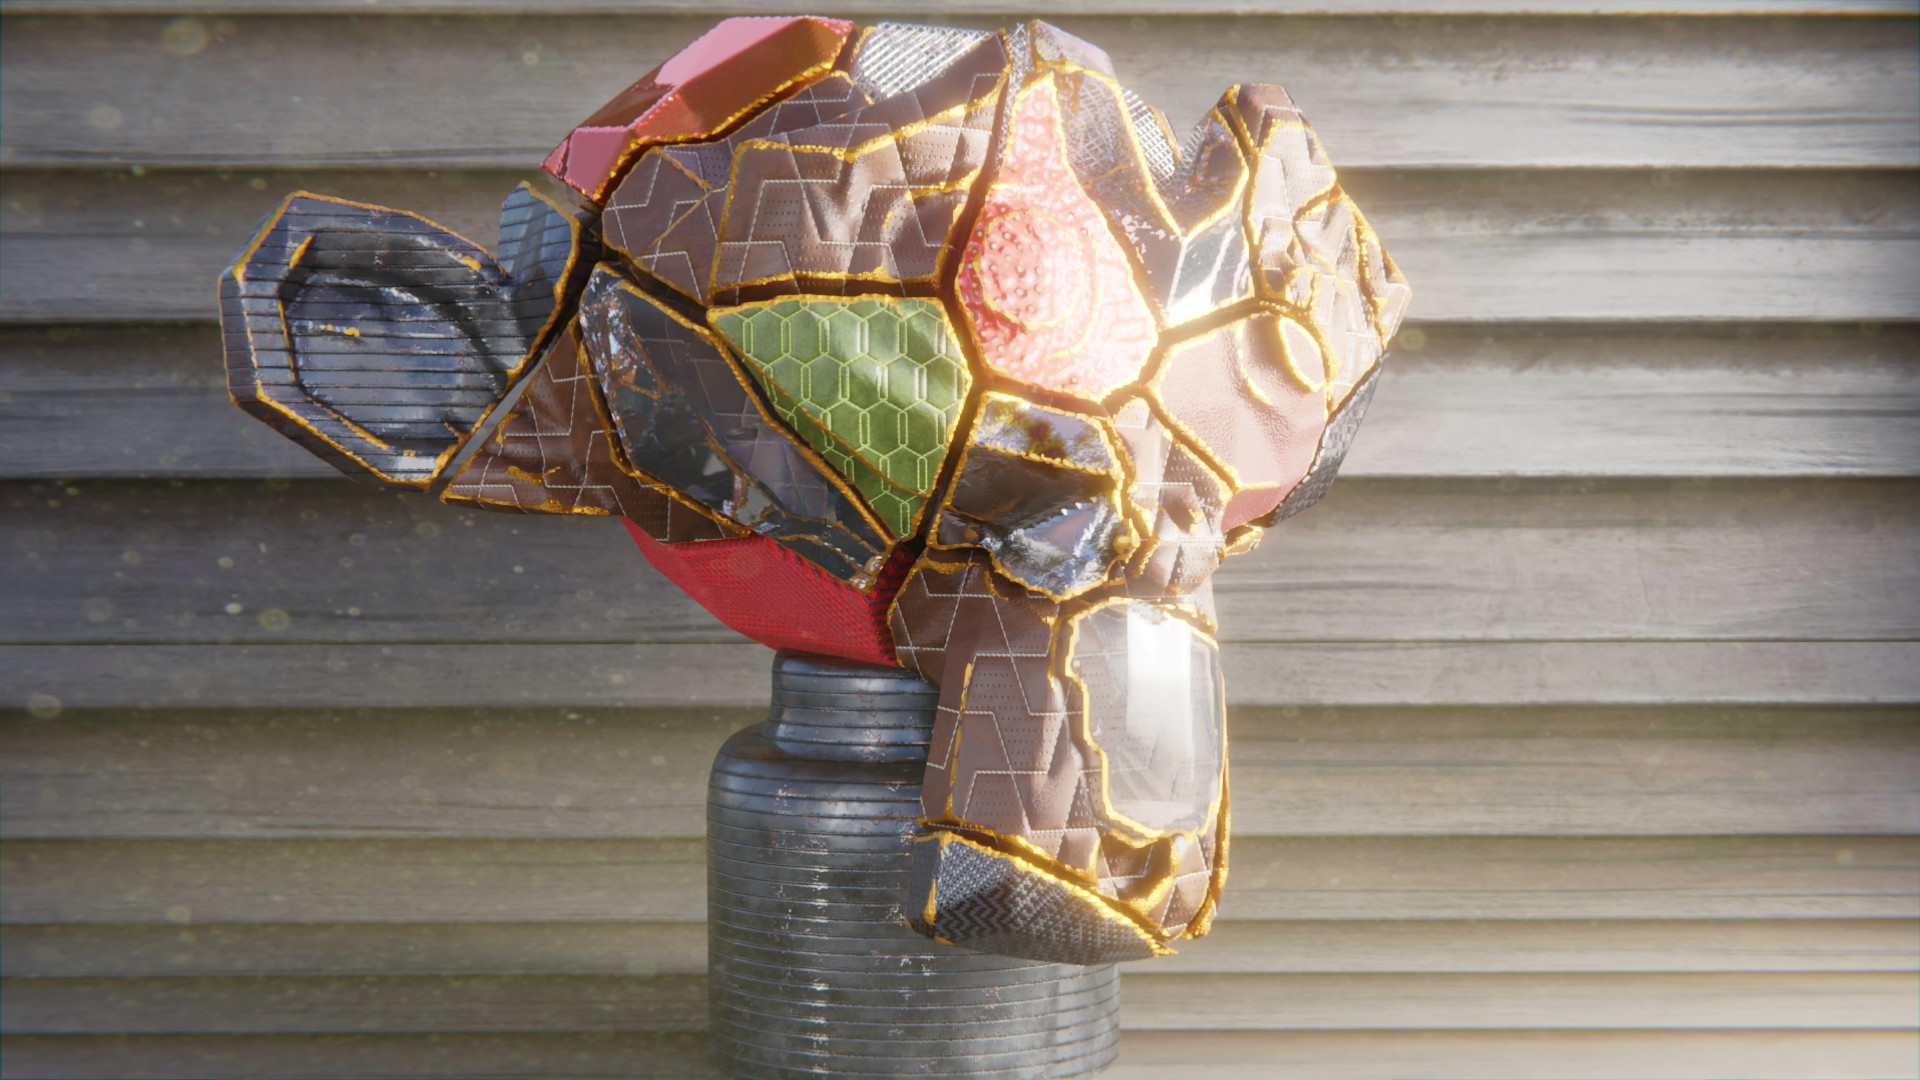
Monkey Head Suzanne With textures
I found this Tutorial about how to put a texture onto the edge of an object. He uses a remesh modifier, and pointiness from the geometry shading node.
Basically, I used a monkey head, and then I tried using different textures from Blendkit. You can Make a new cube object and apply the Blendkit texture to the cube. Then make the whole texture node tree a group and copy the group. Then go back to the texture your following from the tutorial and paste the node group of your texture. Then connect to the mix shader. Use the Pointiness and mapping and coloramp as the Factor mask.
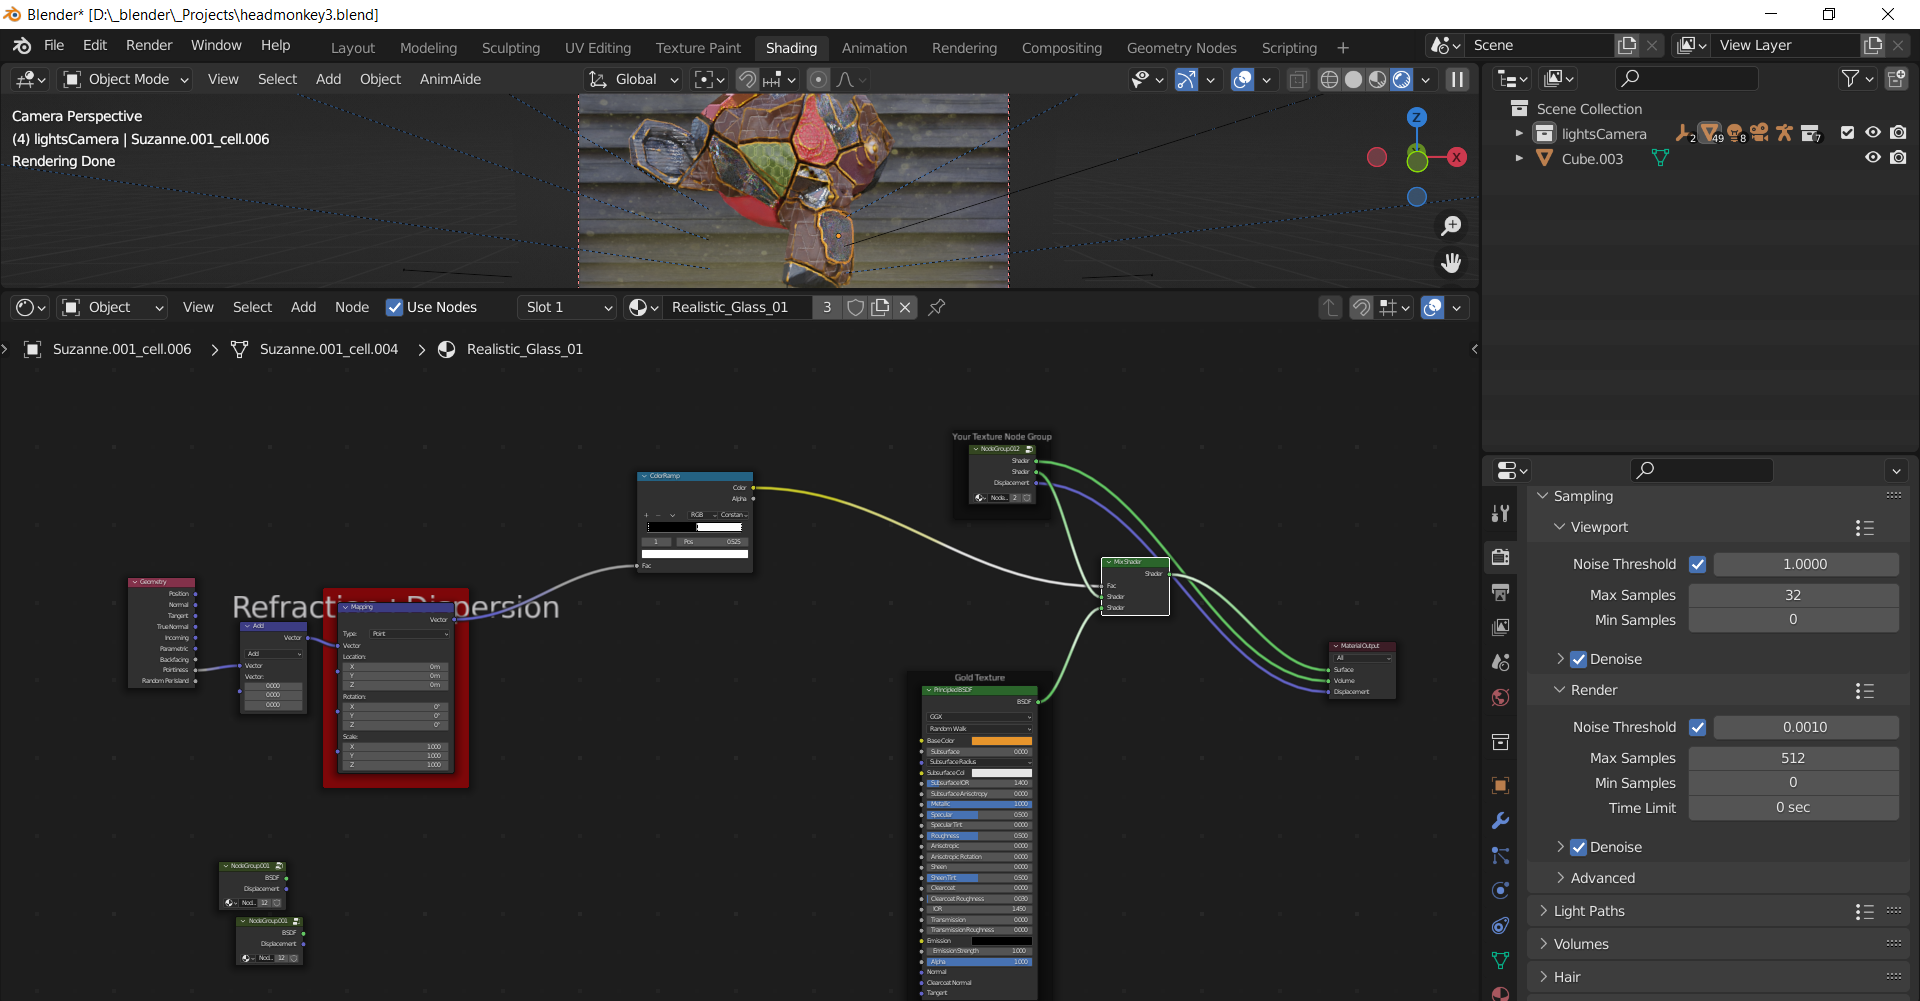
One thing that was confusing was how to make a similar material different, like gold metal, or red metal. I found a good metal texture, made that a group, and then made a new material copied all of the groups and the above node group. The problem was if I changed the color, all the materials changed color. LIke material and material.001. Normally this isn't a problem, but I think it's because I used a node group that Blender was doing this. I clicked on number on the node group that tells you how many users? are using that material and reset that. Then I was able to make a color change to only that node group node tree. That was confusing to me. Also, The displacement wasn't being mixed. In the node group displacement was exposed so I can plug that into the material output. I suppose I could of used another mixshader, or mixrgb.
I then used this tutorial to get some rigid body simulation by the CG essentials.
The below video shows you how to get a little more control on the object that is active. This is an intermediate tutorial.
And for some fun, Adding a wrecking ball to the scene. Using this Tutorial from Blender Guru. This is a beginner Tutorial.
So, that was an older version of blender but using 3.0 most of that was the same. Where you add the modifier to all the links is now under /object/rigid body, and of course instead of blocks in an array, I used a cel fracturd monkey head. So one thing is seeing the tutorial, and another applying that to your scene. I ran into the links falling off, which I fixed by making the mass bigger. I also had a issue where if the simulation isn't cached or saved the render will only render the sim to the last frame you hit play in the timeline to. So Save the entire simulation to disk.
I tried to make a very simple scene with only one cube that reacted correctly with the collision object.
Just simple blend kit textures, and the ball and links with mostly the default settings of the rigid body settings. I adjusted the world setting for speed, to make the simulation a little faster, maybe needs a to be a little faster still.
Then I tried this on my cel fractured monkey and got this.
This is rendered with the noise threshold at 1, and the samples set to 1, very fast to render, and showed me the motion of the objects really well.
Ugg, lots of jittery objects, Started to play with lots of settings to fix that.
Then I noticed a problem with the simulation. Instead of the ball affecting the collision object as it touched the collision simulation started a few frames before.
In this tutorial his technique shows how to fix the monkey head exploding before the ball even touched it, by turning on dynamic on and off just before the impact. You have to do the simulation and kind of gauge where the ball would have been at the right frame. ,
Hit cntl L and link animation to set all the keyframes to all of the cel fractured objects.
Another thing I learned is to run the simulation, so it's cached in memory before rendering. In the side panel, you might want to, click on the scene properties icon, and select bake to make a simulation file. I would run into the problem where the render would show the ball swinging and then stop and render the ball in the same place. To fix I had to stop the render and hit play in the timeline and let the simulation play to the end. I think I should of baked the animation.
If you try to run a quick animation with the render settings to samples of 1, and noise threshold to 1 in blender 3, Then set the resolution to 20% and render out your animation. On an i5 the monkey animation of 230 frames rendered out in about 15 min. This is awesome because in the old blender 2.9 or lower, a simple animation like that would take many times longer.
The last problem is after the ball smashes the monkey the pieces were wiggling on the floor where they should of stopped moving, the objects seem to be rotating or jittering around.
On blender nation a post said to scale everything a little bigger, and or keyframe the deactivate settings. I tried this and still had the jittery issues. Then I tried to keyframe the dynamic field, and I think that stopped the jittering, I didn't actually know where that was in the graph editor to maybe change the vector handle type to ease or Bezier or something that transitions.
If you like Cg Recipes like these, Please consider joining my Patreon.
- Log in to post comments